Initializing and Setting Up the Bot
Table of Contents
 |
|---|
Before continuing, ensure that you have an IDE like Visual Studio Code, and Node.js installed on your machine. Next, check your Node.js version by opening any terminal, such as Command Prompt on Windows, or Terminal on a Mac or Linux machine. Inside the terminal, type node -v, and that will show you the Node.js version installed on your machine. Make sure that the version is greater than V16.9.0. |
Now that we’ve added the bot to our server, we can start building the brains and some basic functions for it.
Creating the Initial Files
- Create a new project folder to contain all of your files. Inside your folder, create two new files:
app.jstoken.json
Open a terminal (Terminal in Windows, Terminal in MacOS, or press Ctrl+~ if you are using Visual Studio Code) and type
cd <folder path>to move into your project folder (How to get folder path in Windows or How to get folder path in MacOS). Do not close this terminal, unless you are confident you can easily set it up again. You will need this instance of the terminal to complete building your bot.Enter
npm initin the terminal. You will then be prompted by this menu: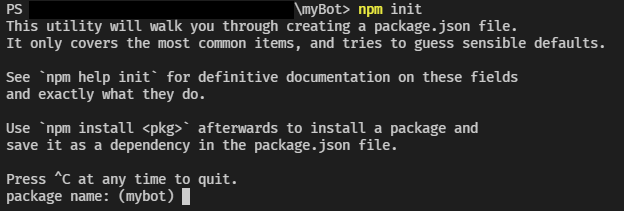
- Hit Enter until you see the prompt for
test command, or 4 times. For this field, writenodemon app.js.
You will see two new files inside your folder:
package.jsonpackage-lock.json
These store data and keep track of the different libraries that you may use in your project. Inside the package.json folder, you can also enter custom scripts that you can use for any purpose, for example, testing.
 |
|---|
If you plan on uploading this project to Git, create a .gitignore file with node_modules and token.json inside. This will stop sensitive information from being published onto your Git repository. |
Installing Libraries
By itself, JavaScript does not have the capability to create a bot that is integrated with Discord. This requires the use of libraries and modules that we will have to install on top of our project.
- Type in
npm install nodemon discord.js discord-api-types. This will install three libraries,nodemon,discord.jsanddiscord-api-types.nodemonis a library that watches your web app’s directory for any changes or modifications. It will automatically restart or stop your app in the event of a modification or an error.discord.jsis a library built off of Discord’s API. This allows you to get and send data directly via Discord, which is an incredibly powerful feature, and makes your job os creating a bot much easier.discord-api-typesis an extension ofdiscord.jsthat allows you to create custom scripts and commands for Discord applications. We will use this library later to write some basic commands for the bot.
- In the
app.jsfile, and at the top, write:// Creates a new session in Discord for your bot to log in and use to function // Require the neccessary libraries const fs = require('fs'); const discord = require("discord.js"); const { token } = require('./token.json'); // Create client instance for your bot to log in const client = new discord.Client({ intents: [discord.Intents.FLAGS.GUILDS] }); // Brings in commands from your /commands folder client.commands = new discord.Collection(); const commandFiles = fs.readdirSync('./commands').filter(file => file.endsWith('.js')); // Imports commands for (const file of commandFiles) { const command = require(`./commands/${file}`); client.commands.set(command.data.name, command); } // Runs your commands client.on('interactionCreate', async interaction => { if (!interaction.isCommand()) return; const command = client.commands.get(interaction.commandName); if (!command) return; try { await command.execute(interaction); } catch (error) { console.error(error); await interaction.reply({ content: 'There was an error while executing this command!', ephemeral: true }); } }) // When the bot has logged in, it will print out in the console "Bot is online!" client.once('ready', () => { console.log('Bot is online!'); }) // Your bot will use its token to log in and connect to your server client.login(token);
This code will log your bot into Discord and allow it to start running. Now, we can add some basic functionality for the bot.
Adding Basic Commands and Functions
Because this guide is only for a very simple and small-scale bot, we are able to put all the commands inside the app.js file. But as projects grow over time, this can be considered a bad practice. If you plan to add more functionality outside this user guide, you can fall victim to a trap known as “if-else hell”.
To avoid this, we will use modular architecture to store different commands in different files. Our project directory should end up looking something similar to this:
    discord_bot/
        |-- node_modules/
        |-- token.json
        |-- app.js
        |-- package.json
        |-- package-lock.json
        |-- runCommands.js
        |-- commands/
                |-- command1.js
                |-- command2.js
Now that we have an idea of what our bot should look like, let’s start by making the runCommands.js file.
runCommands.js
Enter
npm install @discordjs/rest discord-api-typesin your console. This is an extension for thediscord.jslibrary that you can use to write applications and functions using REST API.- Create a JavaScript file inside your project folder named
runCommands.js. In this file, add:// Imports commands from command subfolder for app.js to use // Require files and modules const fs = require('fs'); const { REST } = require('@discordjs/rest'); const { Routes } = require('discord-api-types/v10'); const { clientID, guildID, token } = require('./token.json'); // Creates the list of commands from the /commands folder const commands = []; const commandFiles = fs.readdirSync('./commands').filter(file => file.endsWith('.js')); // Requires the commands into the app.js file for (const file of commandFiles) { const command = require(`./commands/${file}`); commands.push(command.data.toJSON()); } // Creates REST API token const rest = new REST({ version: '10' }).setToken(token); // Verifies all commands are successfully read or will return an error rest.put(Routes.applicationGuildCommands(clientID, guildID), { body: commands }) .then(() => console.log('Successfully registered application commands.')) .catch(console.error); Get your client ID by going back to your application in the developer portal, then clicking Copy under the Application ID. Save this client ID with your bot’s token.
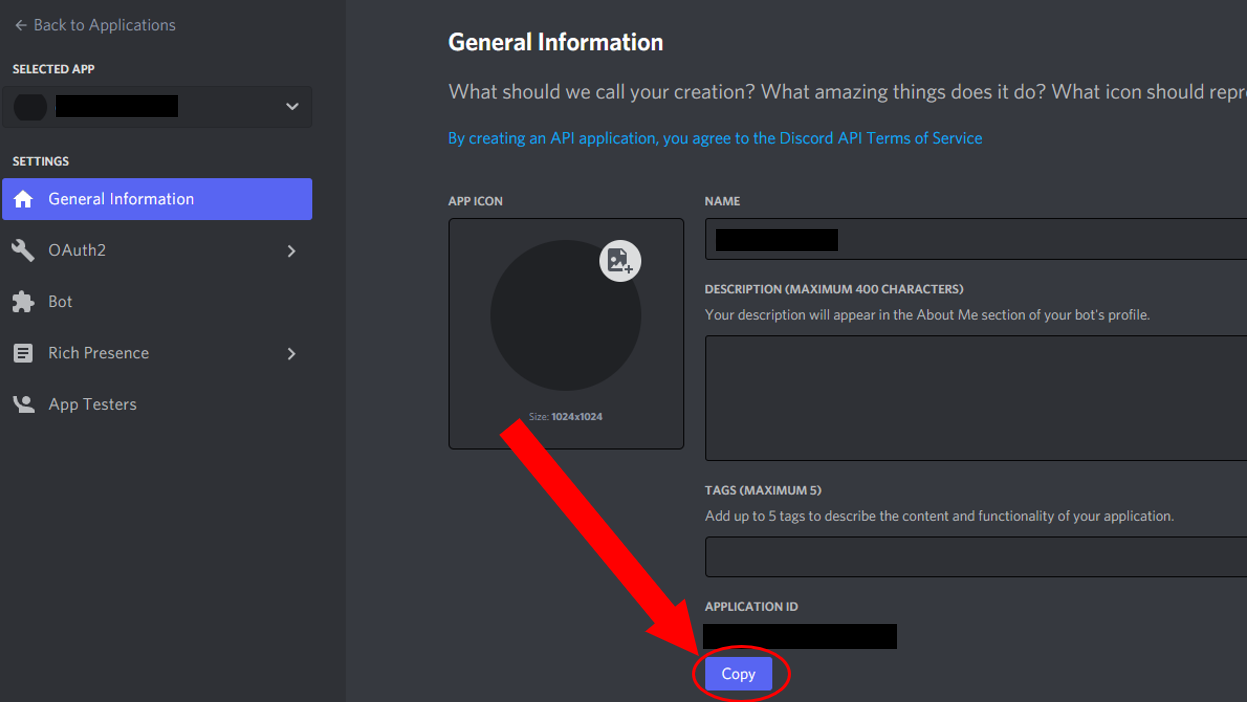
Get your guild ID by going back to your server and right clicking the server’s name or icon. Select Copy ID, and save this with your bot’s token and client ID.

Put your bot’s token, client ID, and guild ID inside the
token.jsonfolder.{ "token": "<Your token here>", "guildID": "<Your guild ID here>", "clientID": "<Your client ID here>" }
|
|---|
| Same with your bot’s token, your client and guild IDs are sensitive and should never be shared under any circumstance. You can regenerate your client ID if needed, but not your guild ID. You must store your guild and client IDs as strings not numbers. You will not be able to run your application if you do so. |
Now that we’ve set up the bot to register commands, we can make the /command folder and start adding functions.
Commands
First, create a new folder named, commands in your project folder. This folder will store all of the JavaScript files containing all of your different functions.
Now let’s add two different commands to our bot. The first command will be a simple reply that we can trigger by greeting the bot, and the second will generate a random number between 1 and 100.
|
|---|
When you create a slash command using the SlashCommandBuilder library, you will have to set a name for the command using the .setName() method. All command names must be all lowercase letters, they cannot contain numbers or uppercase letters, or else they will not work. |
hello.js
Create a new file inside your /commands folder named hello.js. Inside this file, write:
const { SlashCommandBuilder } = require('@discordjs/builders');

module.exports = {
    data: new SlashCommandBuilder()
        .setName('hi')
        .setDescription('Greets the user back'),
    async execute(interaction) {
        return interaction.reply(`Hi ${interaction.user.username}!`);
    },
};
This command will activate whenever you type /hi in your server, and the bot will reply back to you with Hi <Your username>.
randomNumber.js
Create another file inside your /commands folder named randomNumber.js. Inside this file, write:
const { SlashCommandBuilder } = require('@discordjs/builders');
const getRandomNumber = (range) => Math.floor(Math.random() * range);

module.exports = {
	data: new SlashCommandBuilder()
		.setName('randomnumber')
		.setDescription('Generates a number between 0 and 100'),
	async execute(interaction) {
		return interaction.reply(`Your number is ${getRandomNumber(100)}!`);
	},
};
This command will activate whenever you type /randomnumber in your server, and the bot will reply back with Your number is <number>!
Conclusion
Congratulations! You’ve now added some functions to your bot! If you want to add more commands, just follow the same steps above, and change the .setName, .setDescription, and .reply fields to the parameters you want! Otherwise, we can power on the bot and interact with it!